Page Contents
How to change Email id and phone in GST?
Often we found ourselves the need to change the Email id and phone for OTP. Sometimes the contact information updated in the GST portal gets changed. In this post, we will learn about the simple steps to change the email id and phone after obtaining GST Registration.
It’s not mandatory to change both of them together. Only one of them can be updated too. Before we jump upon how to change. First, we need to understand who is an authorized signatory in GST.
Read: Who is an authorized signatory in GST?
When Proprietor/Partner is same as authorized signatory
In the case of proprietorship, the promotor himself can be added to as an authorized signatory. There is no need to appoint an additional one. In the case of a partnership also, a single partner can act as an authorized signatory.
Steps to update Mobile Number and Email In GST
Step 1: The first step is to login into GST Portal.
Step 2: The second step is to move to the top navigation bar. Then Click on Services>User Services> Amendment of Non-Core fields.
Changing mobile numbers and emails are considered non-core fields.

Step 3: In Case Proprietors/Partner is the same as Authorised Signatory, Move to the Proprietor tab and then click on the Edit button.

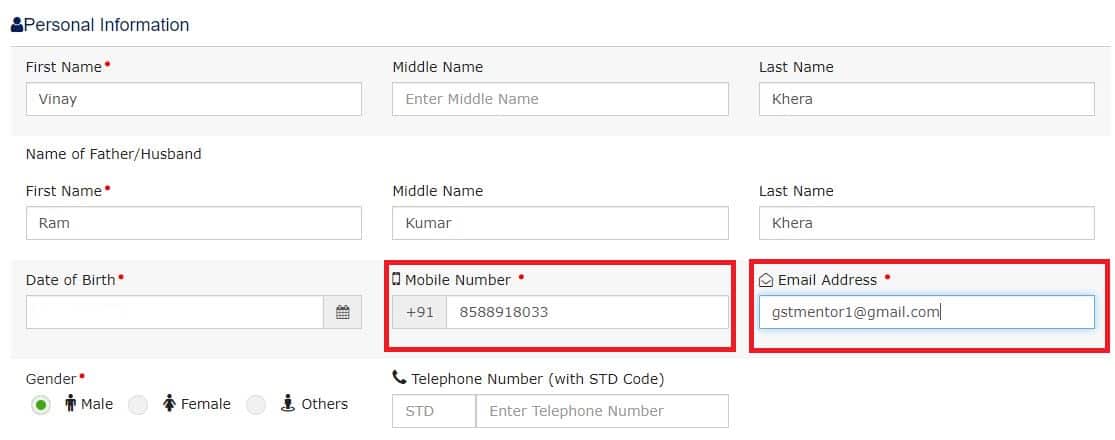
Step 4: Now in the Personal Information tab, update the mobile number and Email address. Then move to the bottom of the page and click on the “Save Button”

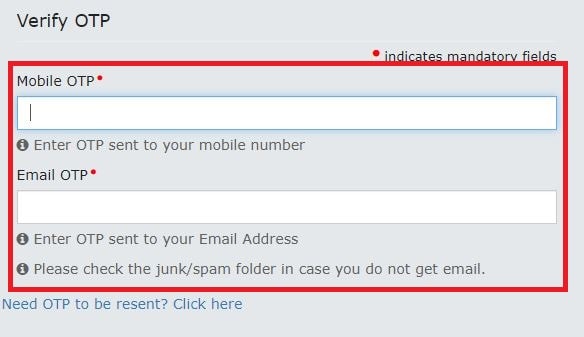
Step 5: Now an OTP would be received on the email and phone. Both the OTP on the Phone and Email are different, so both will be required. After entering both the OTP’s, click on ‘Submit’ button.

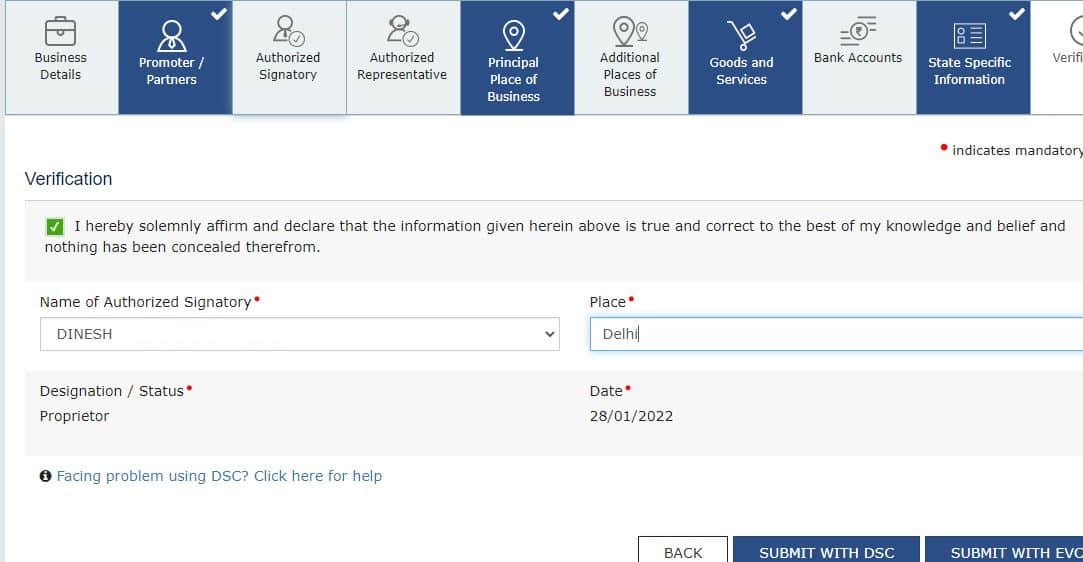
Step 6: Now move to the last column which is ‘Verification”, select the name of Authorised Signatory and Place of changing the mobile number and email. Now, either submit the application via DSC or EVC.
When you select ‘Submit via EVC’, an OTP would be received on the registered email and phone. This time both of them would be the same. Enter the OTP and file the amendment application.
An ARN number would be generated which will be received on the registered email and phone. It will take 10 minutes to an hour to take effect. So, don’t worry and don’t start the application again.

When Authorised Signatory is different from the proprietor or more than one authorized signatory is there
In case, more than one authorized signatory is there and the details need to be updated. Follow the steps below.
Step 1: The first step is to Go to Services Tab>User Services>Amendment of Non-Core fields. The first step is the same as above.
Step 2: The second step is to Go to the Authorized Signatory Tab. Earlier we went to the Proprietor/Partner Tab when the proprietor himself was the Primary Authorized signatory. Now, if you want to add a new authorized signatory, click on the “Add New button” or details have already been added only we have to change the phone number and email, then click on the “Edit” button and edit the details as we have learned above.
Step 3: If new authorized signatory details have been added, after filling in the required information. Move to the Verification tab. Tick the checkbox, select the signatory, add the place and file the application with EVC code or DSC.
Step 4: Wait for 15 minutes to 20 minutes.
Now, again move to the Services>User Services> Amendment Of Noncore fields.
If you want to make the new authorized signatory as “Primary Authorized Signatory”. Go to the Authorized SIgnatory tab and make him/her the primary authorized signatory. Move to the bottom of the page, and click on “Save Button.
Step 5: Move to the verification tab and file the application.
Step 6: An ARN number would be generated and would be received on the registered mobile number and email address.
Read: How to track application via ARN number?

